Vite + React + TypeScript로 npm에 라이브러리 배포하기 (with github actions)

글을 시작하며
기존 프로젝트에 직접 만든 디자인 시스템을 사용하고 싶어, npm에 배포하고 github actions으로 배포 자동화까지 한 방법을 공유하고자 합니다.
Vite + React + Typescrip npm에 배포
1. 프로젝트 세팅
빠른 개발 환경 제공과 효율적인 패키지 관리를 해주는 vite와 pnpm을 사용했습니다.
pnpm create vite .
pnpm i
2. 배포할 컴포넌트 생성
배포할 컴포넌트를 src/lib 폴더 안에 위치해줍니다.

실제 사용하는 곳에서 Tooltip.Root, Tooltip.Content, Tooltip.Arrow, Tooltip.Trigger 점 표기법으로 사용해주기 위해 다음과 같이 객체로 묶어서 export default 해줍니다.
const _Tooltip = ({
 // 생략..
}: TooltipProps) => {

// 생략..

  return (
    <TooltipContextProvider
      value={{
        // 생략..
      }}
    >
      {children}
    </TooltipContextProvider>
  );
};

const Tooltip = {
  Root: _Tooltip,
  Trigger: TooltipTrigger,
  Content: TooltipContent,
  Arrow: TooltipArrow,
};

export default Tooltip;
그리고 이 컴포넌트들을 한번에 lib/index.ts 파일을 생성하여 여기에서 한번에 export 해줍니다.
src/lib/index.ts
export { default as Modal } from './components/Modal/Modal';
export { default as Tooltip } from './components/Tooltip/Tooltip';
3. 만든 컴포넌트 build
경로 설정을 위해 path, @types/node, .d.ts 파일 번들링을 위한 vite-plugin-dts 패키지를 설치해줍니다.
pnpm i -D path @types/node vite-plugin-dts
// vite.config.ts

import { resolve } from 'path';
import { defineConfig } from 'vite';
import dts from 'vite-plugin-dts';

export default defineConfig({
  build: {
    lib: {
      // 라이브러리의 진입점을 지정합니다.
      entry: resolve(__dirname, 'src/lib/index.ts'),
      // 라이브러리의 이름을 'index'로 설정합니다.
      name: 'index',
      // 출력 파일 이름을 'index'로 지정합니다.
      fileName: 'index',
    },
    rollupOptions: {
      // 번들링되지 않고 피어 종속성으로 취급해야 하는 외부 종속성을 지정합니다.
      external: ['react', 'react-dom'],
      output: {
        globals: {
          react: 'React',
          'react-dom': 'ReactDOM',
        },
        // 출력 파일 앞에 "use client"; 문자열을 추가합니다.
        banner: '"use client";',
        // 'auto'는 자동 인터옵 처리를 의미합니다.
        interop: 'auto',
      },
    },
  },
  // Vite 플러그인 배열을 설정합니다. dts(): 라이브러리의 TypeScript 선언 파일을 생성합니다.
  plugins: [dts()],
});
lib 폴더의 파일들을 build 하기 위해 tsconfig.json의 include 경로를 src/lib으로 수정합니다.
// tsconfig.json
{
  "compilerOptions": {
    "target": "ES2020",
    "useDefineForClassFields": true,
    "lib": ["ES2020", "DOM", "DOM.Iterable"],
    "module": "ESNext",
    "skipLibCheck": true,

    /* Bundler mode */
    "moduleResolution": "bundler",
    "allowImportingTsExtensions": true,
    "resolveJsonModule": true,
    "isolatedModules": true,
    "noEmit": true,
    "jsx": "react-jsx",

    /* Linting */
    "strict": true,
    "noUnusedLocals": true,
    "noUnusedParameters": true,
    "noFallthroughCasesInSwitch": true,

    /* npm publish */
    // 타입 선언 파일을 생성
    "declaration": true, // 추가
    //  타입 정의 파일을 찾을 위치를 지정
    "typeRoots": ["./dist/index.d.ts"] // 추가
  },
  // TypeScript가 컴파일할 소스 코드의 경로를 지정
  "include": ["src/lib"], // 변경
  "references": [{ "path": "./tsconfig.node.json" }]
}
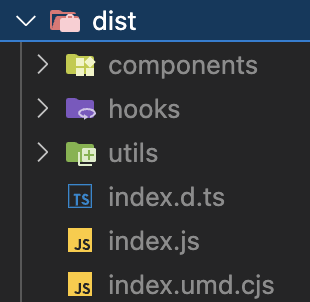
빌드 명령어를 통해 배포할 파일을 생성합니다.
pnpm build
생성된 모습
4, npm에 배포
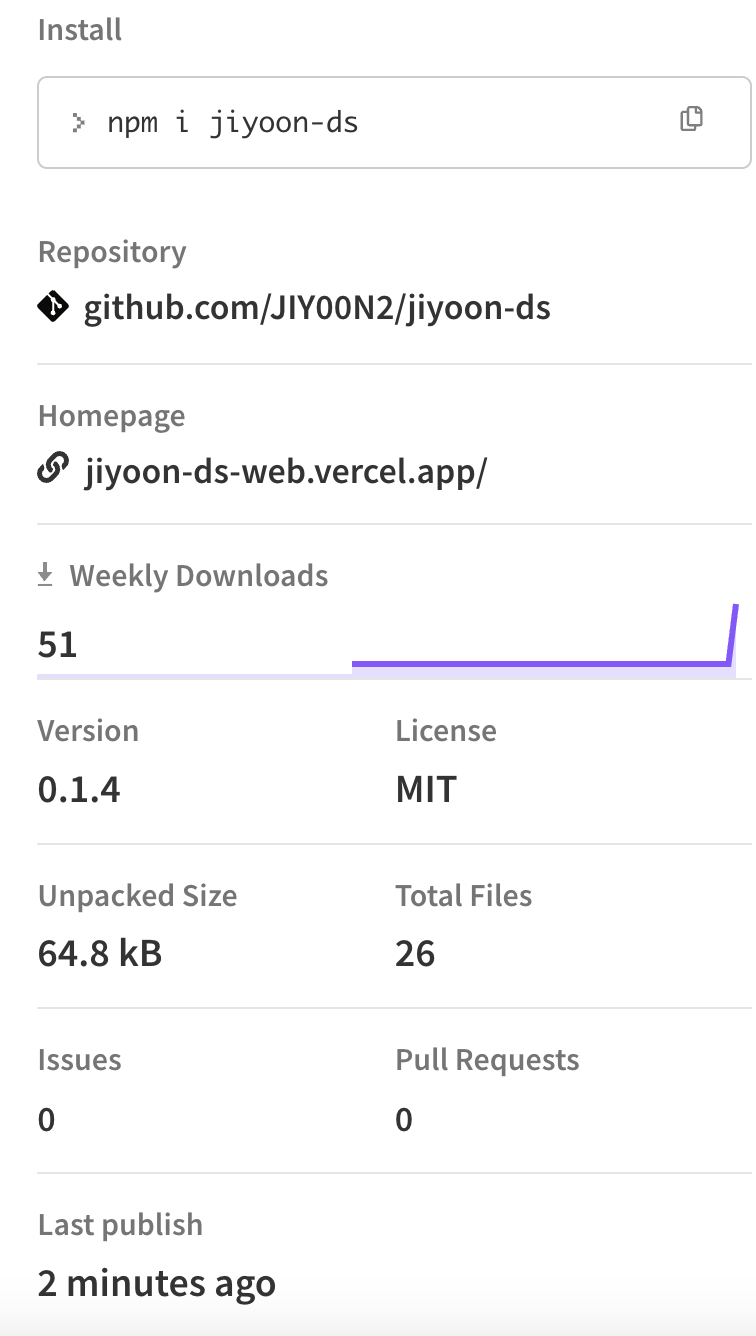
컴포넌트를 npm에 배포하기 위해서 package.json에 패키지에 다음과 같이 entry point를 작성합니다.
{
  "name": "jiyoon-ds", // 패키지의 이름을 지정합니다. 미리 npm에 검색 필수!
  "private": false, //  false로 설정해야 npm에 배포가 가능
  "version": "0.1.3", // 현재 패키지의 버전을 나타냅니다. 처음에 버전 업이 필요하다.
  "description": "Design Systems using React Components", // 패키지의 설명
  "keywords": [
    "react",
    "components",
    "design systems"
  ], // 패키지와 관련된 키워드
  "author": {
    "name": "jiyoon",
    "email": "angella990825@gmail.com"
  }, // 패키지의 저자 정보
  "repository": {
    "type": "git",
    "url": "https://github.com/JIY00N2/yoon-ds.git"
  }, // 소스 코드의 저장소 정보
  "homepage": "https://jiyoon-ds-web.vercel.app/", // 패키지의 홈페이지나 관련 웹사이트의 URL을 제공
  "license": "MIT", // 패키지의 라이선스
  "type": "module",
  "files": [
    "dist"
  ], // 패키지가 포함할 파일들의 리스트
  "main": "./dist/index.umd.cjs", // CommonJS 환경에서 사용할 메인 파일의 경로를 지정
  "module": "./dist/index.js", // ES Modules 환경에서 사용할 메인 파일의 경로를 지정
  "types": "./dist/index.d.ts", // TypeScript 프로젝트에서 사용할 타입 정의 파일의 경로를 지정
  "exports": {
    ".": {
      "import": "./dist/index.js", //  import는 ES Modules에서 사용할 파일 경로를,
      "require": "./dist/index.umd.cjs" //  require는 CommonJS에서 사용할 파일 경로를 지정
    }
  }, // 패키지의 내보내기 설정
  "scripts": {
    "dev": "vite",
    "build": "rm -rf dist && tsc && vite build",
    "lint": "eslint . --ext ts,tsx --report-unused-disable-directives --max-warnings 0",
    "preview": "vite preview"
  },
  "dependencies": {
    "react": "^18.2.0",
    "react-dom": "^18.2.0"
  },
  "devDependencies": {
    "@types/node": "^20.14.2",
    "@types/react": "^18.2.66",
    "@types/react-dom": "^18.2.22",
    "@typescript-eslint/eslint-plugin": "^7.2.0",
    "@typescript-eslint/parser": "^7.2.0",
    "@vitejs/plugin-react": "^4.2.1",
    "eslint": "^8.57.0",
    "eslint-plugin-react-hooks": "^4.6.0",
    "eslint-plugin-react-refresh": "^0.4.6",
    "path": "^0.12.7",
    "typescript": "^5.2.2",
    "vite": "^5.2.0",
    "vite-plugin-dts": "^3.9.1"
  }
}
이후에 npm에 로그인하고, 배포합니다.
npm login
npm publish
Github Actions으로 배포 자동화
1. npm 에서 access token 발급
- 프로필 클릭 후 "Access Tokens" 클릭
- Generate New Token 클릭 후 "Classic Token" 클릭
- 토큰 Name 입력, Automation 선택 후 "Generate Token" 버튼 클릭
2. github action 에 secret key 등록
- 레포지토리 Settings 클릭
- Secrets and variables 의 Actions 클릭
- New repository secret 클릭
- key 이름은
NPM_TOKEN으로 지정하며, 토큰은 앞서 npm 에서 발급받은 access token 입력 후 Add secret 클릭
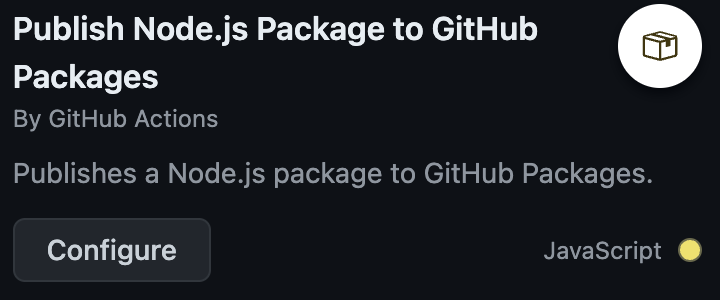
3. github/workflows/npm-publish-github-packages.yml 파일 작성
github에서 제공하는 Publish Node.js Package to GitHub Packages을 기반으로 작성했습니다.
name: Npm Publish

# workflow가 태그가 붙은 푸시 이벤트에 반응하여 실행됨을 나타냅니다.
# 여기서 'v*'는 이름이 'v'로 시작하는 모든 태그를 포함합니다.
on:
  push:
    tags:
      - 'v*'

jobs:
  publish:
    runs-on: ubuntu-latest
    permissions:
      contents: read
      packages: write
    steps:
      - uses: actions/checkout@v4
      - uses: actions/setup-node@v3
        with:
          node-version: 18
          registry-url: https://registry.npmjs.org/
      - run: npm install -g pnpm
      - run: pnpm install
      - run: pnpm run build
      - run: npm publish --access=public
        env:
          NODE_AUTH_TOKEN: ${{secrets.NPM_TOKEN}}
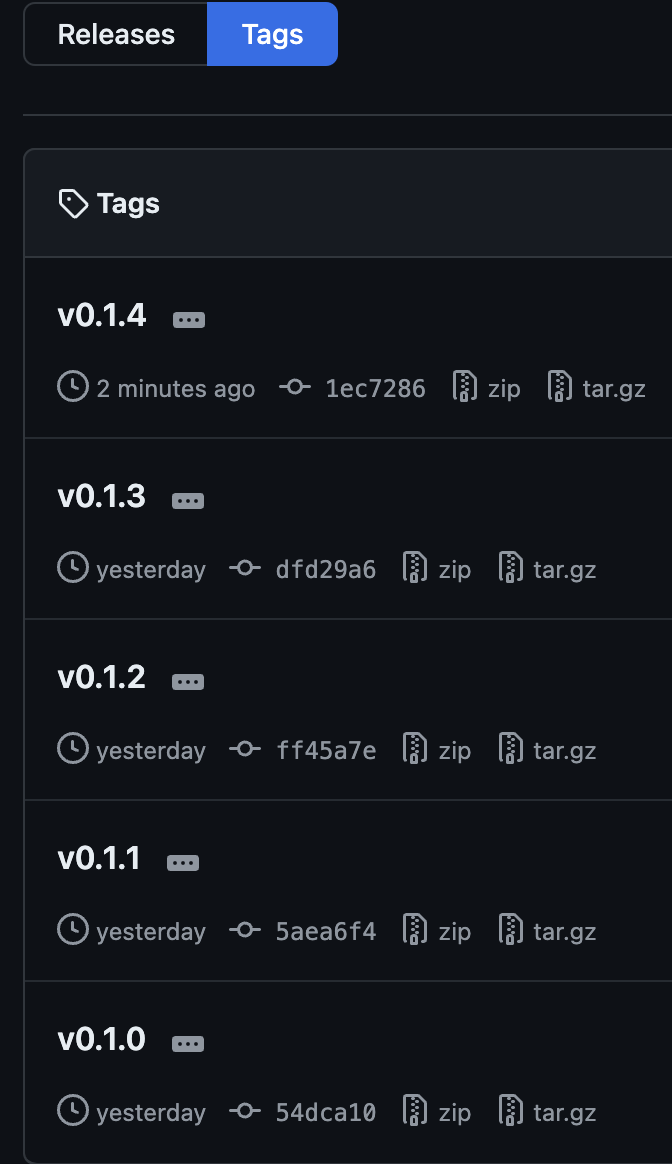
4. 새로운 tag 생성 시 npm 배포 진행
git tag -a <tagname> <commit-hash> -m "Message"
git push origin <tagname>
사용하기!
1. 설치
npm i jiyoon-ds
2. Next.js에서 사용하기
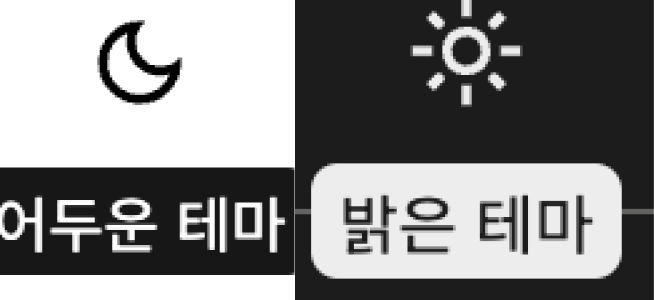
Yoon Log 프로젝트에서 테마 버튼에 Tooltip을 적용해보았습니다.
import { Tooltip } from "jiyoon-ds";
import { PropsWithChildren } from "react";
import stylex from "@stylexjs/stylex";

export const ThemeTooltip = ({
  children,
  isDark,
}: PropsWithChildren<{ isDark: boolean }>) => {
  return (
    <Tooltip.Root direction="bottom">
      <Tooltip.Trigger>
        {children}
      </Tooltip.Trigger>
      <Tooltip.Content {...stylex.props(styles.content)}>
        {isDark ? "밝은 테마" : "어두운 테마"}
      </Tooltip.Content>
    </Tooltip.Root>
  );
};

const styles = stylex.create({
  content: {
    display: "flex",
    color: "var(--backGround)",
    backgroundColor: "var(--font)",
    fontSize: "12px",
    padding: "2px 5px",
    borderRadius: "5px",
  },
});
"use client";

import useTheme from "@/app/_context/ThemeContext/useTheme";
import stylex from "@stylexjs/stylex";
import Image from "next/image";
import { ThemeTooltip } from "../Tooltip/ThemeTooltip";

export default function ThemeButton() {
  const { isDarkMode, toggleDarkMode } = useTheme();

  return (
    <ThemeTooltip isDark={isDarkMode}>
      <button
        onClick={toggleDarkMode}
        {...stylex.props(styles.button)}
      >
        {isDarkMode ? (
          <Image
            src={"/images/light-mode.svg"}
            alt="light-mode"
            width={22}
            height={22}
          />
        ) : (
          <Image
            src={"/images/dark-mode.svg"}
            alt="dark-mode"
            width={22}
            height={22}
          />
        )}
      </button>
    </ThemeTooltip>
  );
}

const styles = stylex.create({
  button: {
    display: "flex",
    justifyContent: "center",
    alignItems: "center",
  },
});
토글 된 모습
참고 자료
[React] vite와 함께 리액트 컴포넌트 npm에 배포하기
npm 에 내가 만든 패키지 배포하기 (feat. github action 으로 배포 자동화)
글을 마치며
배운점
- vite + react + ts를 npm에 배포하는 방법
- github actions으로 배포 자동화하는 방법
마무리
지금까지 직접 만든 디자인 시스템을 npm에 배포하고 github actions으로 자동화까지 해보고 사용까지 해보았습니다.
이후에는 컴포넌트를 추가하고, JY DS WEB에다가 문서화를 해보려고 합니다.
읽어주셔서 감사합니다.