이미지 업로드 & 서버에서 폼 다루기
By Yoon
·

Supabase를 사용해 이미지 업로드와 서버에서 폼을 다룬 내용입니다 - 블로그 개발 후기 (3)
글을 시작하며
블로그에 글을 쓰기 위해서 폼은 빠질 수 없는 필수 요소입니다.
더욱이 글에서의 이미지는 글을 풍성하게 해주고, 한눈에 요점을 파악하게 도와줍니다.
이미지 업로드 기능을 어떻게 구현하고, 폼을 어떻게 관리했는지 이야기해 보려고 합니다.
이미지 업로드 구현 (with Supabase)
생각 정리
이미지를 본문에 어떻게 담을까?
- 이미지를 본문에 담고 싶으면 어떻게 해야 할까에 대해 생각해 보았습니다.
그냥
DB에 담으면 되는 거 아닌가?
-> 비용이 많이 들다..
-> 그러면URL을 클라우드 서비스의 버킷에 넣고 브라우저가 가지고 올 수 있게 하자!
클라우드 서비스
- 클라우드 서비스에도 다양한 종류(IaaS, PaaS, SaaS등)가 있습니다.
- 개발 및 배포 프로세스를 빠르게 확보하기 위해
PaaS를 사용했습니다. PaaS중에서도 요즘 뜨고 있는Supabase의Storage를 사용해 이미지 업로드를 구현했습니다.
Supabase 사용하기
1. bucket 생성
- bucket을 생성해 주고, 각각의 값을
.env파일에 보관합니다.
// .env
SUPABASE_BUCKET=
SUPABASE_URL=
SUPABASE_KEY=
2. Supabase Storage에 파일을 업로드하는 방법
- 공식 문서를 참고했습니다.
// app/_utils/bucket.ts
import { createClient } from "@supabase/supabase-js";

// Create Supabase client
const supabase = createClient(
  process.env.SUPABASE_URL!,
  process.env.SUPABASE_KEY!,
);

// Upload file using standard upload
export async function uploadFile(file: File, path: string) {
  const { data, error } = await supabase.storage
    .from(process.env.SUPABASE_BUCKET!)
    .upload(path, file);

  if (error) {
    throw new Error(`${error.message} + ${path}`);
  }

  const url = supabase.storage
    .from(process.env.SUPABASE_BUCKET!)
    .getPublicUrl(data.path);

  return url.data.publicUrl;
}
이미지 업로드 구현하기
input의onChange속성으로file값을 가져오고uploadFile함수로 넘겨줍니다.uploadFile함수에서/api/admin/upload로 이미지 업로드 요청을 보냅니다.Route handlers로upload API를 만들고,Supabase에 업로드 된 이미지URL을 가져옵니다.- 가져온
URL을 마크다운 형식으로 입력 가능하게 합니다. - 전역 상태인
content에 이미지URL을 추가해 줍니다.
- 고도화: Drag and Drop도 가능하도록 구현했습니다.
// app/_components/PostForm/ImageInput.tsx
"use client";

import { ChangeEvent, useCallback } from "react";
import useDragAndDrop from "@/app/_hooks/useDragAndDrop";
import useContentContext from "@/app/_context/ContentContext/useContentContext";

export default function ImageInput() {
  const { setNewContent } = useContentContext();

  const uploadFile = useCallback(
    async (file: File) => {
      const formData = new FormData();
      formData.append("file", file);
      try {
        const res = await fetch("/api/admin/upload", {
          method: "POST",
          body: formData,
        });
        const data = (await res.json()) as {
          imageFileName: string;
          imageUrl: string;
        };
        let url = `<p align="center"><img src=${""} alt=${""} width="100%" height="100%"/></p>`;
        if (data.imageUrl) {
          url = `<p align="center"><img src="${data.imageUrl}" alt="${data.imageFileName}" width="100%" height="100%" /></p>`;
        }
        setNewContent((content) => content + url);
      } catch (error) {
        // 생략..
      } finally {
        // 생략..
      }
    },
    [setNewContent],
  );

  const handleFileInputChange = useCallback(
    (e: ChangeEvent<HTMLInputElement> | DragEvent) => {
      let file;
      if ("dataTransfer" in e) {
        file = e.dataTransfer?.files[0];
      } else {
        file = e.target.files?.[0];
      }
      if (file) {
        uploadFile(file);
      }
    },
    [uploadFile],
  );

  const [, dragRef] = useDragAndDrop<HTMLLabelElement>(
    handleFileInputChange,
  );

  return (
    <>
      <label htmlFor="image" ref={dragRef}>
        // 생략..
      </label>
      <input
        id="image"
        type="file"
        onChange={handleFileInputChange}
        disabled={// 생략..}
      />
    </>
  );
}
// app/(route-handlers)/api/admin/upload/route.ts
import { uploadFile } from "@/app/_utils/bucket";
import { NextRequest, NextResponse } from "next/server";
import { v4 as uuid } from "uuid";

export async function POST(req: NextRequest) {
  try {
    const formData = await req.formData();
    const imageFile = formData.get("file") as File;
    const imageFileName = imageFile.name;
    const imageFilepath = `${uuid()}.${imageFileName.split(".").pop()}`;
    const imageUrl = await uploadFile(imageFile, imageFilepath);
    return NextResponse.json({ imageFileName, imageUrl });
  } catch (error) {
    return NextResponse.json(
      { error: (error as Error).message },
      { status: 500 },
    );
  }
}
결과
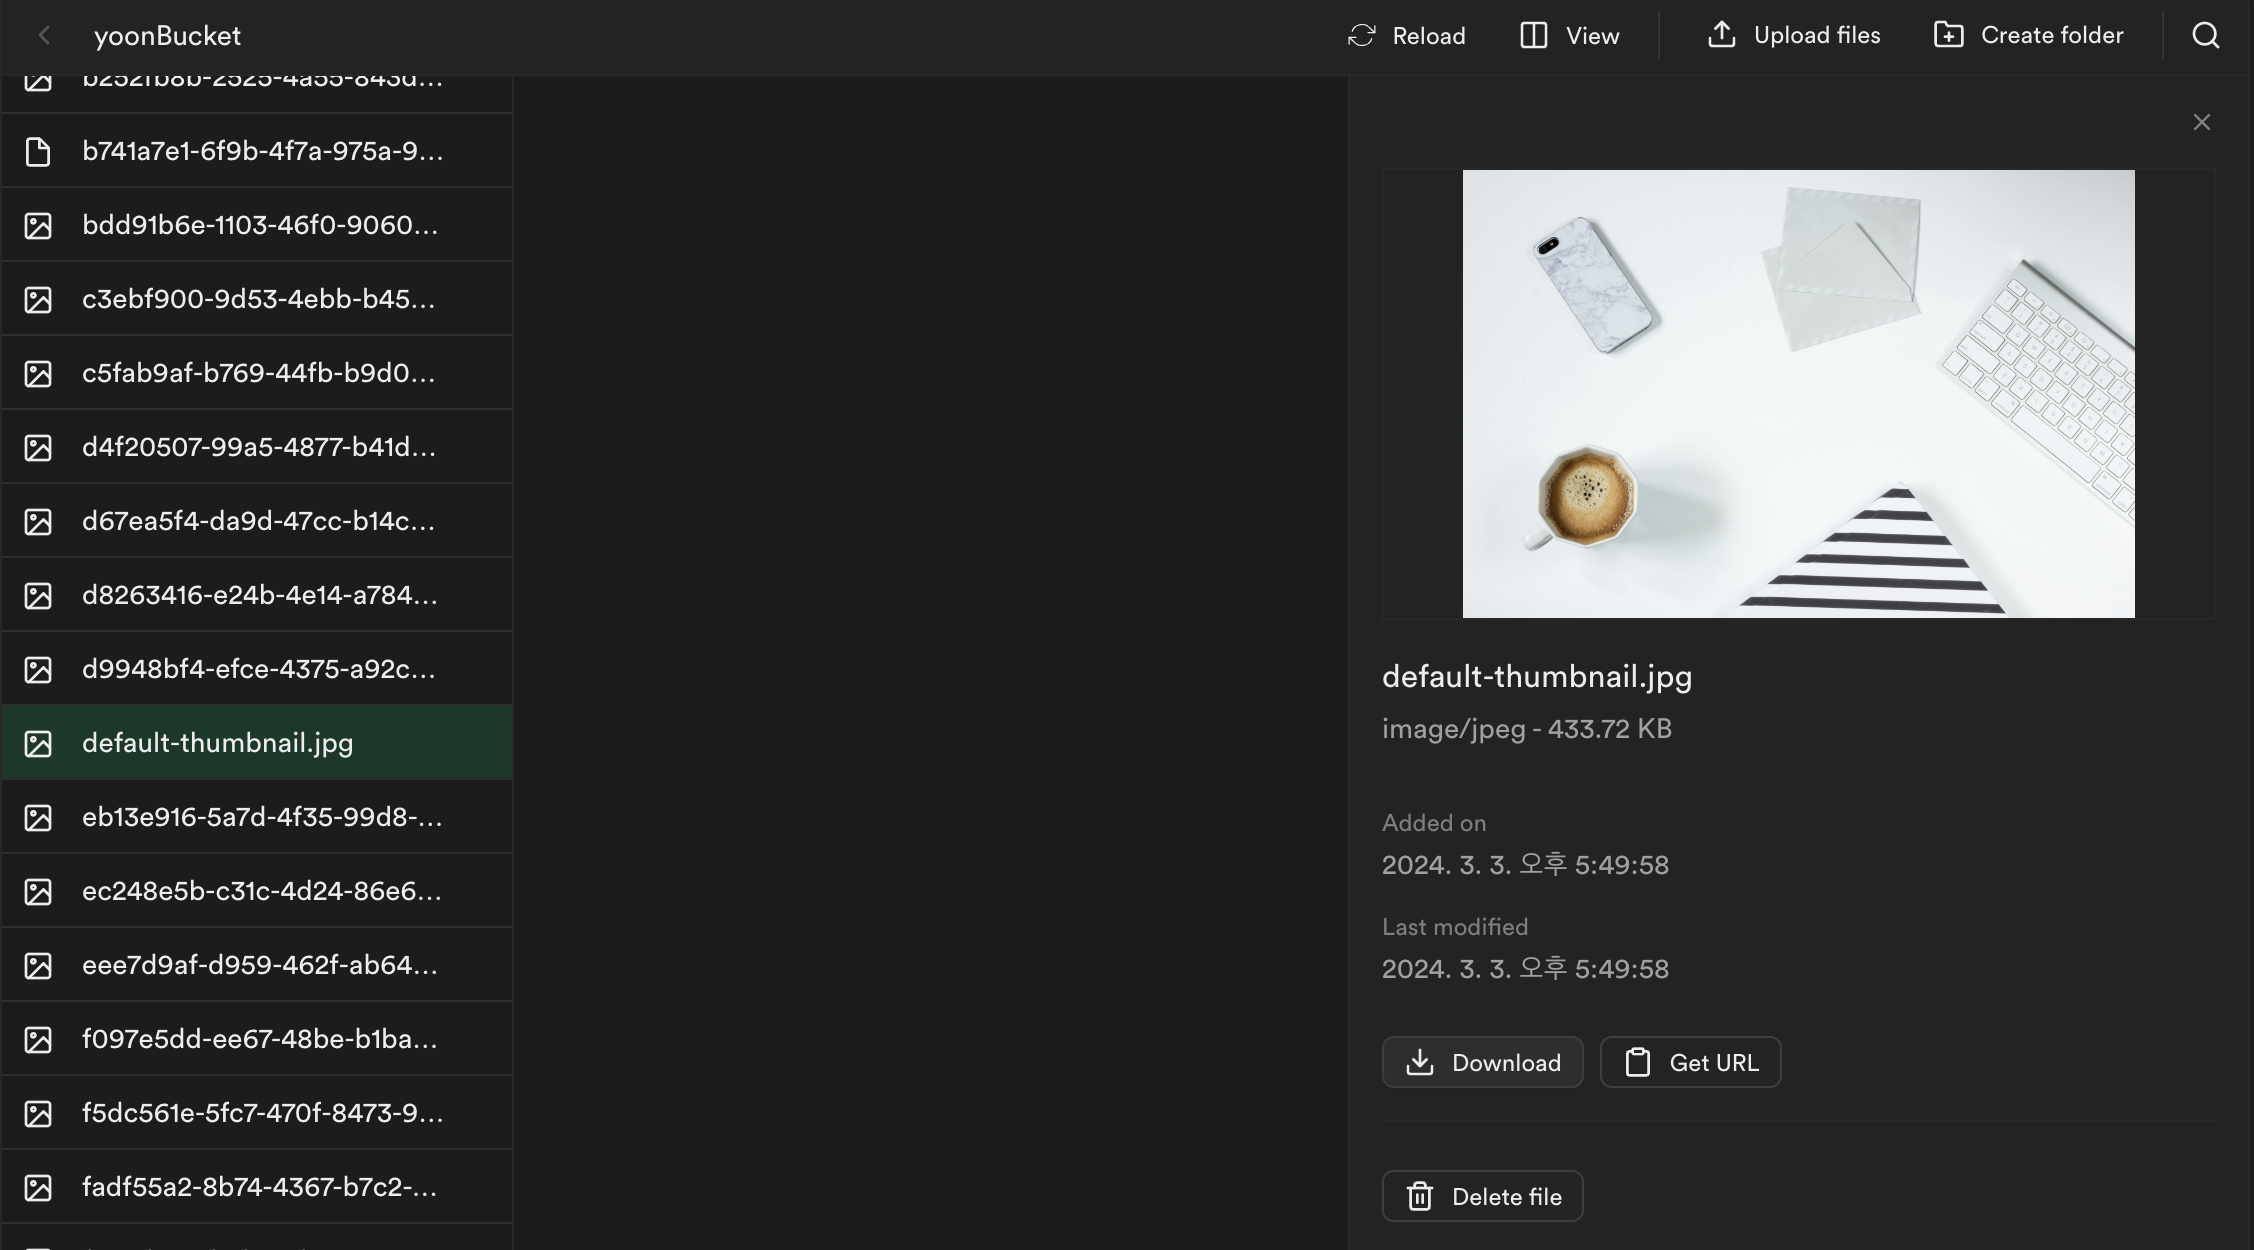
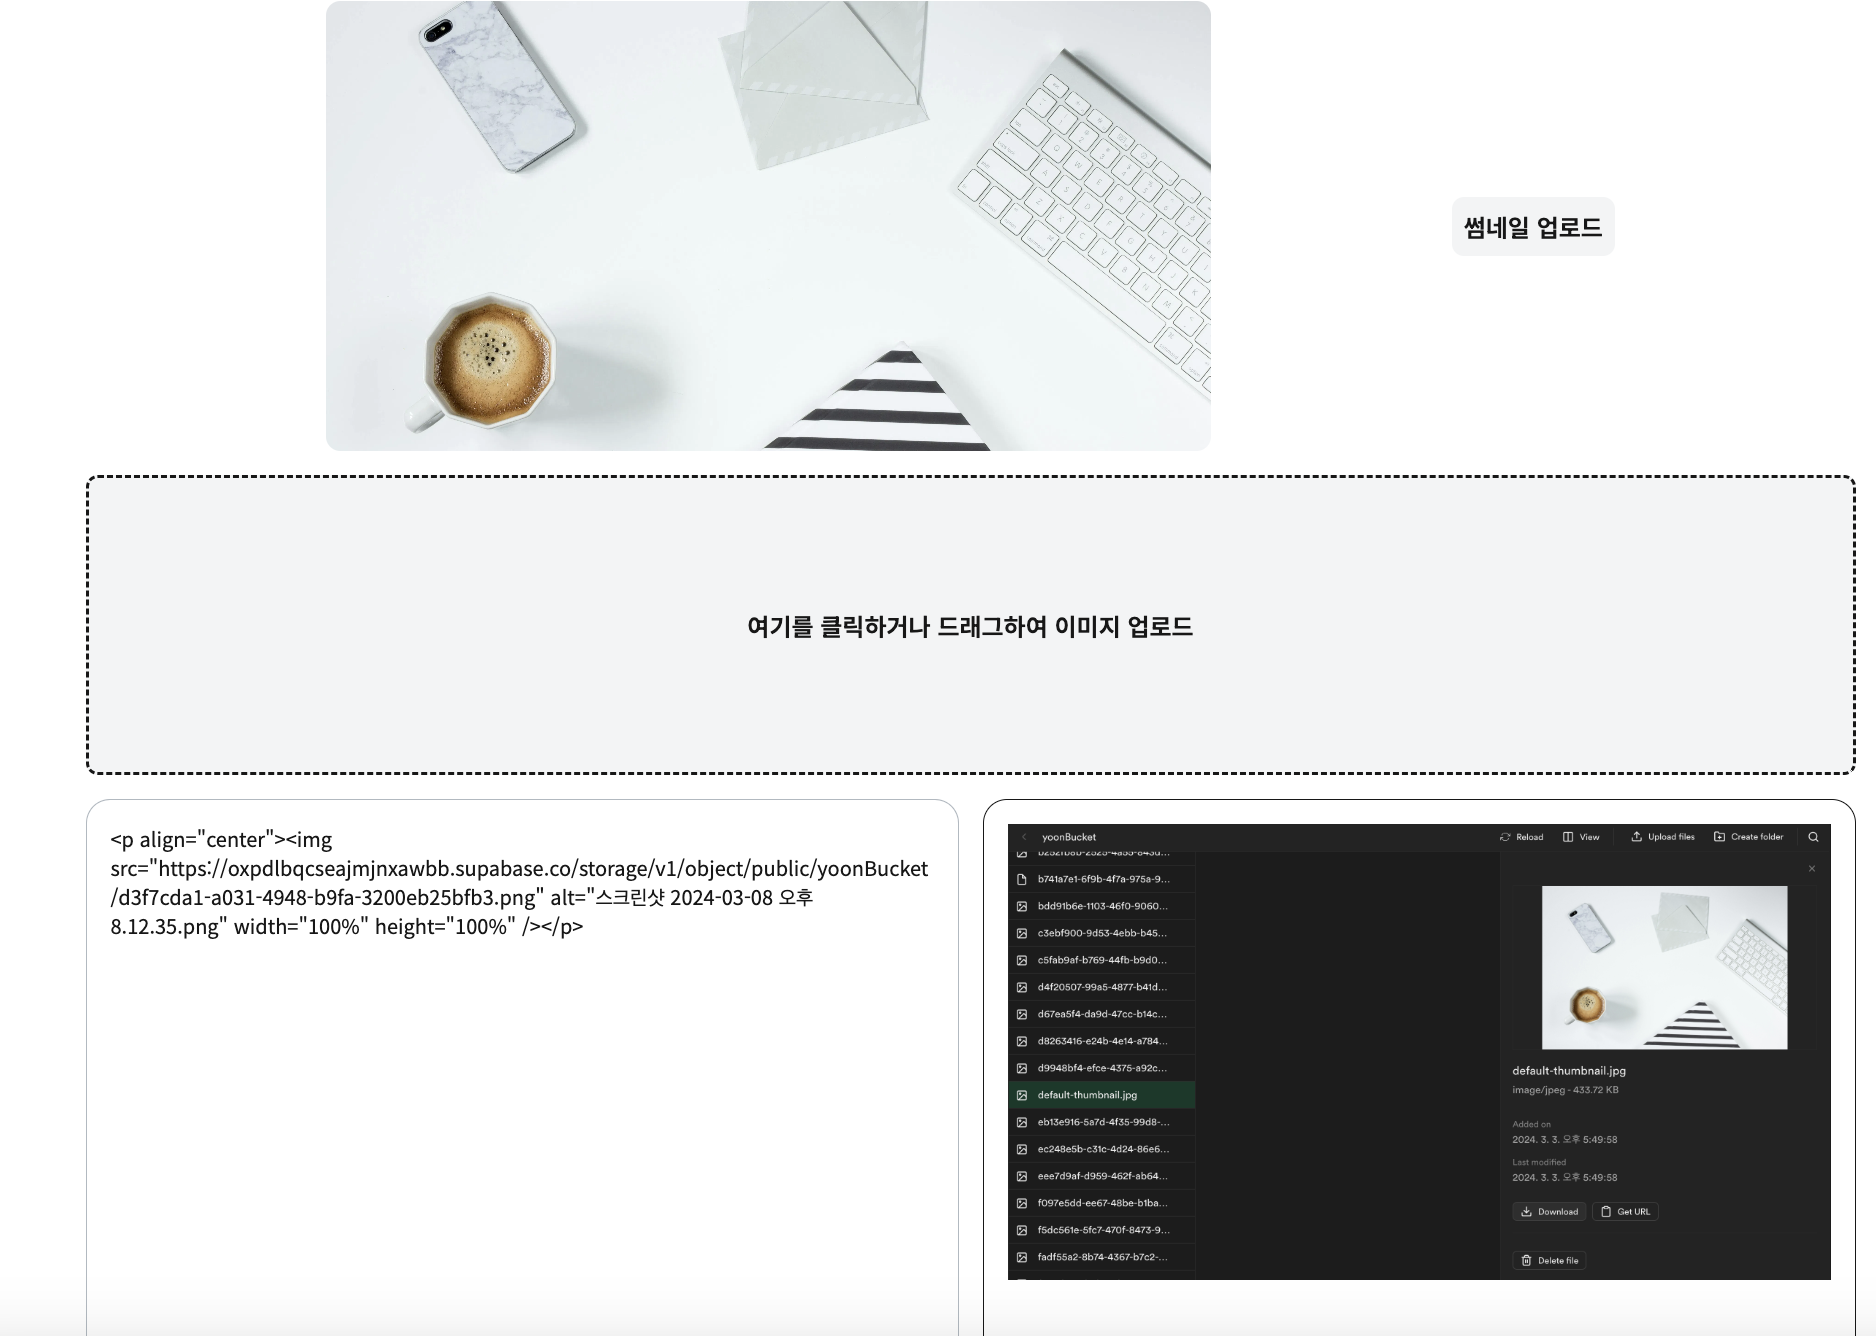
Get URL로 이미지url을 얻을 수 있습니다.
- 글 생성 페이지에서 이미지 업로드 시에 다음과 같이 나타납니다.
서버에서 폼 다루기
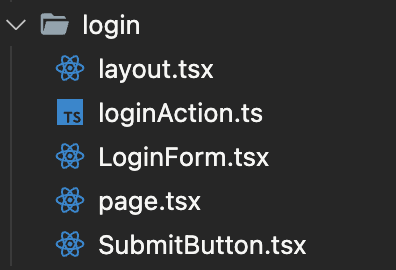
- 블로그 구현 시에 사용한 많은 폼이 있지만, 본문에서는 로그인 폼으로 다루겠습니다.
- 로그인 페이지 폴더 구조입니다.
서버에서 로그인 폼 다루기
Server Action
Server Action은 폼의Mutation(생성, 업데이트, 삭제)을 할 수 있게 해주는Next.js의 강력한 기능입니다.Server Action을 사용하면, API 엔드포인트를 생성하지 않고도 컴포넌트 내에서 비동기 함수를 직접 정의할 수 있습니다.- Server Action 더 알아보기
useFormState
useFormState는 폼 액션의 결과를 기반으로state를 업데이트할 수 있도록 제공하는Hook입니다.- 컴포넌트 최상위 레벨에서
useFormState를 호출하여 폼 액션이 실행될 때 업데이트되는 컴포넌트state를 생성합니다. - useFormState 더 알아보기
useFormStatus
useFormStatus는 마지막 폼 제출의 상태 정보를 제공하는Hook입니다.- useFormStatus 더 알아보기
폼 관리하기
Server action에서form에 입력된input값을input태그의name속성으로 가져옵니다.useFormState를 사용하려면 최상위 컴포넌트여야 하므로 폼이 있는LoginForm에서 사용합니다.LoginForm은Client Component이므로Server Component에서Props를 통해Server action을 받아옵니다.action의결과 값으로useFormState로state값(success, error, message)을 업데이트해 줍니다.SubmitButton으로 폼을 제출하면useFormStatus로LoginForm의 상태를 알 수 있습니다.- 상태 값으로
pending상태일 때,SubmitButton을disabled해 줄 수 있습니다.
// app/(root)/login/loginAction.ts
"use server";

export async function loginAction(
  prevState: {
    success: boolean;
    error: boolean;
    message: string;
  },
  formData: FormData,
) {
  const inputPW = formData.get("password")?.toString();
  // 생략..
  if (inputPW) {
    // 생략..
    if (isAdmin) {
      // 생략..
      return {
        success: true,
        error: false,
        message: "로그인 성공!",
      };
    } else {
      return {
        success: false,
        error: true,
        message: "비밀번호가 일치하지 않습니다.",
      };
    }
  }
  return {
    success: false,
    error: true,
    message: "비밀번호를 입력해주세요!",
  };
}
// app/(root)/login/page.tsx
import LoginForm from "./LoginForm";
import { loginAction } from "./loginAction";

export default async function LoginPage({
  searchParams,
}: {
  searchParams: { redirect: string };
}) {
  return (
    <section>
      <LoginForm
        redirectUrl={searchParams.redirect}
        handleLogin={loginAction}
      />
    </section>
  );
}
// app/(root)/login/LoginForm.tsx
"use client";

import SubmitButton from "./SubmitButton";
import { useFormState } from "react-dom";

type Props = {
  handleLogin: (
    prevState: {
      success: boolean;
      error: boolean;
      message: string;
    },
    formData: FormData,
  ) => Promise<{
    success: boolean;
    error: boolean;
    message: string;
  }>;
  redirectUrl: string;
};

export default function LoginForm({ handleLogin, redirectUrl }: Props) {
  const [formState, formAction] = useFormState(handleLogin, {
    success: false,
    error: false,
    message: "",
  });

  return (
    <form action={formAction}>
      <div>
        <div>
          <label htmlFor="password">
            관리자 로그인
          </label>
          <span>
            글을 작성하거나 수정할 수 있는 권한은 관리자만 가능합니다.
          </span>
        </div>
        <div>
          <input
            id="password"
            name="password"
            type="password"
            placeholder="비밀번호를 입력해주세요.."
          />
        </div>
        <SubmitButton />
      </div>
    </form>
  );
}
// app/(root)/login/SubmitButton.tsx
import { useFormStatus } from "react-dom";

export default function SubmitButton() {
  const { pending } = useFormStatus();

  return (
    <button
      type="submit"
      disabled={pending}
    >
      {pending ? "로그인 중.." : "로그인"}
    </button>
  );
}
결과
- 로그인 시 다음과 같이 폼 액션의 결과를 기반으로
success, error, message등state가 업데이트되고 있습니다.
글을 마치며
배운것
- Supabase로 이미지 업로드
- Server action을 사용해 폼 다루기
- Server Component, ClientComponent 분리하기
- useFormState, useFormStatus 사용법
마무리
지금까지 Supabase를 사용해 이미지 업로드와 서버에서 폼을 다룬 내용입니다.
읽어주셔서 감사합니다.